A Designer’s Eye on the Eraser Vector Embroidery Design
The Instant Appeal: Nostalgia Meets Playful Professionalism
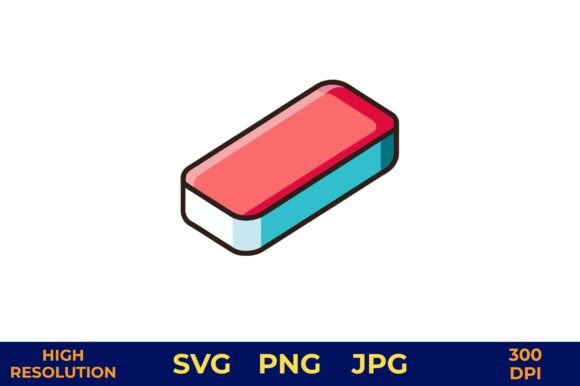
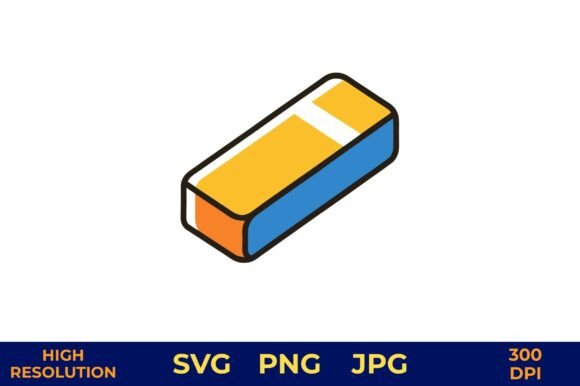
When I first opened the Eraser Vector Design for Stationery, my immediate reaction was a smile. This isn't just a graphic; it's a mood. The bright, classic yellow and blue palette against a clean white isolation instantly evokes a sense of organized creativity. It feels playful yet precise—perfect for projects that want to communicate a sense of thoughtful fun. The vector-based lines are crisp and clear, which is the first thing any embroidery designer looks for. A clean, simple shape like this is a dream for translating into stitches.
For embroidery, this design’s personality leans towards gifts, personalized items, and boutique merchandise. It doesn’t scream loud; it whispers clever. I pictured it immediately on a canvas tote bag for a teacher, or as a subtle, charming detail on a baby’s nursery pillow. Its theme is universal—school, writing, creativity, correction—making it incredibly versatile for storytelling through products.
Where This Design Thrives in Real Embroidery Projects
Let’s walk through a real scenario. Say I’m preparing a custom embroidered sweatshirt for a small shop’s back-to-school promotion. Using the Eraser Vector Design, my primary goal is clarity and stitch integrity. The simple, bold shapes mean satin stitches for the blue metal band and fill stitches for the yellow body can be applied beautifully without excessive density. On a mid-weight cotton sweatshirt, with proper stabilizer, this will stitch out cleanly and hold up to wear.
It’s a strong candidate for custom apparel like t-shirts and aprons, personalized gifts like tea towels or wedding gift handkerchiefs for a writer, and small business merchandise such as embroidered patches or caps for a stationery shop. For Etsy sellers and craft fair products, this design offers a quick, recognizable icon that adds value without overwhelming the item. It also works seamlessly in digital product previews and printable mockups for those selling the finished design files themselves.
Because of its isolated background and transparent format, placing it on digital mockups for baby clothes or boutique branding is straightforward. The emotional connection—that little burst of nostalgia—can enhance customer engagement and make a handmade product feel more giftable and special.
Potential Pitfalls and Where to Use Caution
No design is universally perfect, and a practical review requires honesty. The Eraser Vector Design, while simple, has areas that demand attention in certain embroidery projects.
- Small Hoop Sizes: If you’re trying to stitch this very small, perhaps on a cap’s curved front or a delicate handkerchief corner, those crisp edges could become a blur if the stitch density isn’t adjusted. The small details of the metal band and eraser shadow need space to breathe.
- Textured or Dark Fabrics: On dark fabrics, the bright yellow will need a very conscious thread choice—perhaps a near-neon contrast—to maintain its cheerfulness. On highly textured fabrics like linen or some towels, the clean fill stitch areas might not appear as smooth.
- Products Requiring Heavy Wash: For items like kitchen towels or baby clothes that face frequent washing, a design with large fill areas needs excellent stabilizer application and high-quality thread to prevent premature wear.
It’s not a design for overly stretchy fabric without significant testing, as the fill stitch could pucker. Always, always test on scrap fabric first.
How This Design Influences Product Value and Perception
From a business and craft perspective, using a well-executed vector graphic like this elevates your work. It signals professionalism because the final embroidered result will be clean and intentional. For a craft business owner, that builds customer trust—they see a polished, recognizable icon, not a fuzzy, poorly-digitized shape.
It aids in brand consistency if your shop focuses on school themes, office supplies, or playful learning. The design’s inherent visual appeal is its simplicity, which translates directly into stitching clarity. A clear stitch outcome makes the finished product look more valuable, whether it’s a $30 sweatshirt or a $15 tote bag.
For the embroidery designer or digital product seller providing this file to others, its quality as a starting point is high. It gives your client a solid foundation, reducing their prep time and increasing the likelihood of a successful project, which in turn boosts your reputation.
Essential Designer Notes Before You Stitch or Sell
Before you load this Eraser Vector Design into your machine or list it in your shop, here’s my practical checklist.
- Check Thread Color Contrast: Don’t assume the digital colors. Stitch out a sample with your intended threads on both light and dark backgrounds to see the real effect.
- Review Stitch Density: Especially if you or your client plans to resize it dramatically. Too dense on small sizes can cause stiffness; too sparse on large sizes can look gappy.
- Confirm Hoop Size Compatibility: While the design is simple, ensure your chosen hoop can accommodate the size you want without forcing awkward rotations.
- Inspect Small Details: Zoom in on the file. Are there tiny corners or lines that might vanish or become problematic stitches? Adjust if necessary.
- Use Proper Stabilizer: Match your stabilizer to the fabric. This is non-negotiable for maintaining that crisp vector look in the final stitches.
- Licensing and Commercial Use: The product description states it’s for download and print your own, but always confirm the specific license if you intend to sell the finished embroidered items or the embroidery file itself. Never assume.
Remember, a design like this is an asset. Its true worth is realized not in the digital preview, but in how thoughtfully you apply it to fabric, to products, and to your creative or commercial vision. The Eraser Vector Design for Stationery is a delightful, versatile starting point—now make it stitch beautifully.